
This one was a challenge for me and if you know me I have a hard time saying NO to any project anyone puts in front of me... So here we go.....
I got a phone call from one of my wonderful neighbours who lives 2 doors across the street from me wanting to know if I wanted to refinish a cabinet for a 90 Year Old Lady...
Well of course even before she gave me all the details I said yes.
BIG MISTAKE( I'll Explain )...
Never say yes until you actually set eye on whatever you are supposed to be restoring...
Anyway..
I decided to take on the challenge and this is what I did.
HERE IS THE CABINET THAT THEY WANTED ME TO REFINISH!
It had been at rest for over 50 years they told me in a chicken coop...
The weather and Chickens had really done a number on this beauty. :'(
The weather and Chickens had really done a number on this beauty. :'(

Something had been eating away at the top
Maybe it was those Chickens LOL!

The wood trim holding the old rippled glass in was almost all rotted away

The inside shelves were stained real bad..
The bottom shelf looks like it had some kind of can on it that leaked on the shelf and left a big nasty stain

The hardware was so rusted I had to scrape out the debri in the screw slots just so I could get my screwdriver in to take them out..

Most of them were so bad The just pulled right out of the wood
and it was so rusted the hardware wasn't working at this point.

Ahhhh! and then you have the back...
Not sure if that is Chicken Poop or Mud dobbers???
Not to worry! Back is coming off and going in the burn pile,
NO salvaging that part...

Not sure how it made it but the Original glass was still in tact
What a relief. =)

SO NOW FOR THE TRANSFORMATION!
First I sanded
Wearing my trusty Ventilated mask of course, cause you just don't know what particles will be flying around in the air...SAFETY FIRST!.=)
First I sanded
Wearing my trusty Ventilated mask of course, cause you just don't know what particles will be flying around in the air...SAFETY FIRST!.=)

All the hardware and Screws went into a Jar of Lime A-Way
This has always worked well for me in the past on those nasty rusted objects

I let them sit for about 2 days and then with Rubber gloves removed them and used a very fine grit steel wool to remove any left over rust deposits left behind.

I had to stop sanding in some areas because of these little marks appearing in the wood
someone said they are worm holes

I called the person I was re doing this for and they said to leave it it adds character to the piece
Which I agree so I left it and clear coated over it
Mind you the wood was so dry that the clear coat just sucked itself into the wood as soon as I applied it so I had to re coat a few times.
Mind you the wood was so dry that the clear coat just sucked itself into the wood as soon as I applied it so I had to re coat a few times.

The Top was also very messed up but once again they didn't want me to fix this either..
It had a lot of water damage and looks like the worms were having a BIG feast.

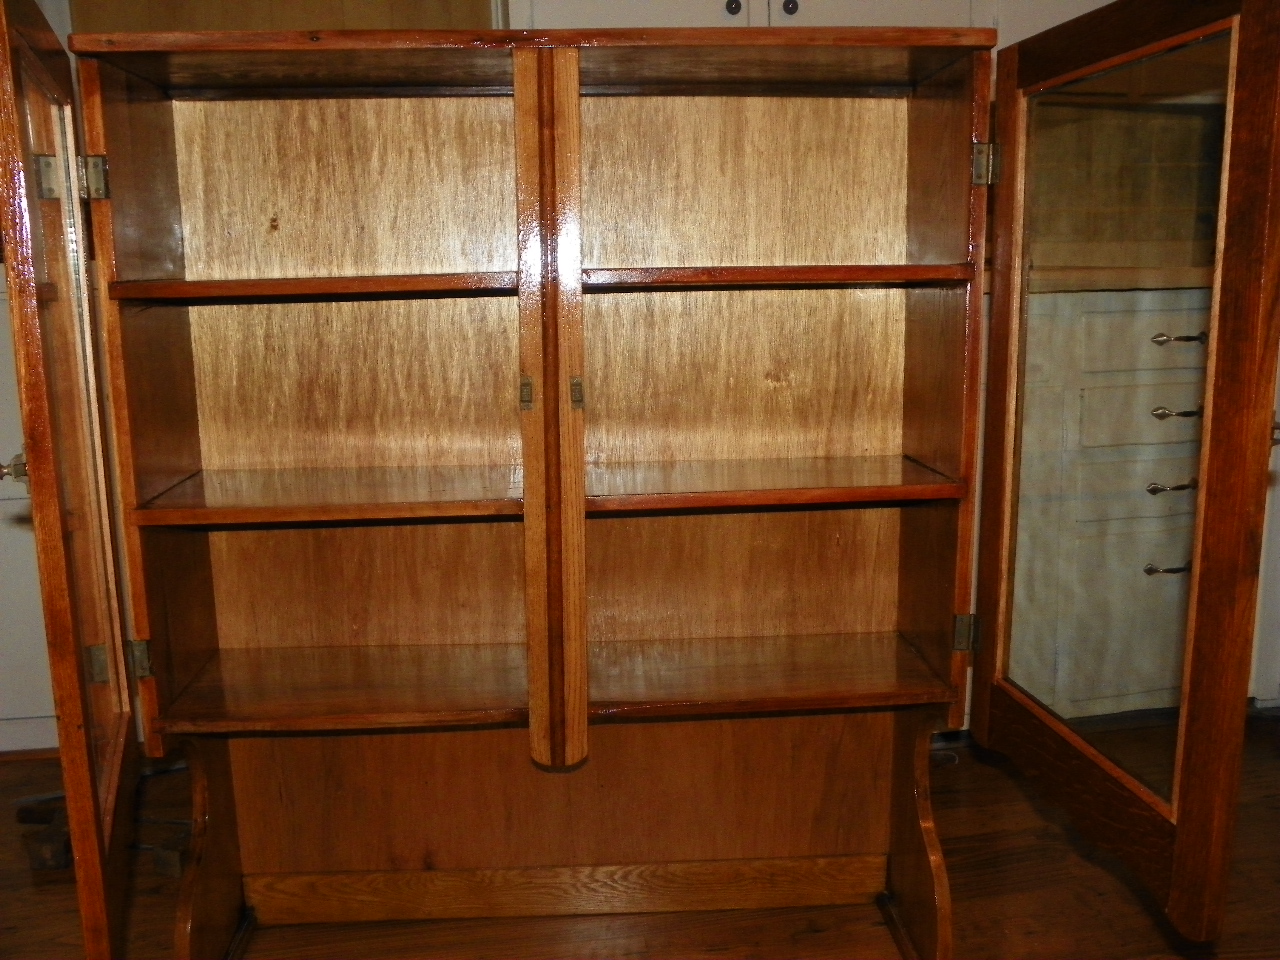
Look at the different colors in the wood on the shelves
I just love this.=)

I replaced all the trim work to hold the glass in place cause there was really nothing left of the old
and I needed something to hold the old glass in place
From this angle you can almost see the ripples in the glass
How beautiful!

I then added the back
I used 1/4" Luan

Put the hardware back on
Look how much cleaner they look
I added a little 3-in-One Household Oil which
(lubricates,cleans,polishes and prevents rust and tarnish)
to the hinges and door locks.

And they work perfectly now =)

I just love the scrolled pattern at the bottom of these doors
SO PRETTY!

That Glass is just amazing ♥


AND THERE YOU HAVE IT!
That nasty chicken coop cabinet restored and ready to be hung once again hopefully for another 100 years or so..;)

The Old Lady absolutely Loves her new cabinet
Which makes me feel great...
But I have to say this was one of my biggest challenges yet and I don't think I will be doing another one of these any time soon...
Well You just never know wink! wink! ...
I'm such a glutton for punishment LOL!
Cheers♥
Thanks for stopping by and
Feel free to comment I read all of them..=)


Looks great! And thanks for the tip about the Lime A-way.
ReplyDeleteThank You and You are welcome...Lime-A-Way is just like CLR ( Calcium Lime Rust)remover that you find at you Home Improvement center It just has a fancier name and you can find it at the grocery store..:)
DeleteWow! That's a lot of work!! Great job! Never heard of Lime A-way- gotta get me a bottle. Thanks for dropping by and following!
ReplyDeleteThank you Nancy and thanks for dropping by too.:) Cheers!
DeleteYou did a great job! The cabinet really looks beautiful now, and I love the curves too!
ReplyDelete-Kayla
http://whateverislovely-blog.com/
Thanks Kayla.;) I checked out your Blog page and I really love all the stuff you have done ..I went to comment on your No sew Curtains but it wouldn't let me SORRY! Not sure why? But I liked your FB page..:) Cheers! I am a fan.
DeleteBeautiful job!!!
ReplyDeleteBeautiful job. When you have an old dry piece such as this it hepatitis to fill a continue with water and set it nearby to allow the wood to absorb moisture from the air. I did an amazing China cabinet that was almost 100 years old and had been in a grain bin for at least 30 of the years. The water trick worked wonders and allowed me to save the back with a bit of effort.
ReplyDeleteBeautiful job. When you have an old dry piece such as this it hepatitis to fill a continue with water and set it nearby to allow the wood to absorb moisture from the air. I did an amazing China cabinet that was almost 100 years old and had been in a grain bin for at least 30 of the years. The water trick worked wonders and allowed me to save the back with a bit of effort.
ReplyDeleteHi nice reading yourr blog
ReplyDelete