
Another PINTEREST moment
So here we are again...
I have been so busy with all my signs I've been making that I finally got a break to make another PINTEREST inspirational piece...
So this is what I was inspired by......
A KITCHEN ISLAND MADE FROM AN OLD DOOR!
.JPG)
I TOTALLY FELL IN LOVE WITH THIS ISLAND!!!
this is the site I found it on
So here we go....................
I started with a simple 24" old Door
My Cat Blacky wanted to be in the pictures :)

Everything Looks OK on this side Mum...

But then he got Bored and went to torment Sasha....

Sasha was in deep thought and didn't know Blacky was there....
Or was it all just a TRICK????

and soon Blacky lost interest.....

W hat a Clever GIRL!!!!

Awwwwe Maybe next time Blacky... NOT!!!! Hahahahaha
OK so back to the door....
I removed all the Hardware.


Then I filled the void where the handle was with a block of wood...

Now for the Water Putty.... I love this stuff it Dries REAL Hard...


And then sanded and sanded and sanded..................................

When all the holes were filled in and Sanded it was time to apply
the Vaseline before the paint

Now to SPRAY PAINT the entire door.............
OK after spray paint is applied allow to dry fully then get
a flat scraper and scrape away the paint where the Vaseline was applied
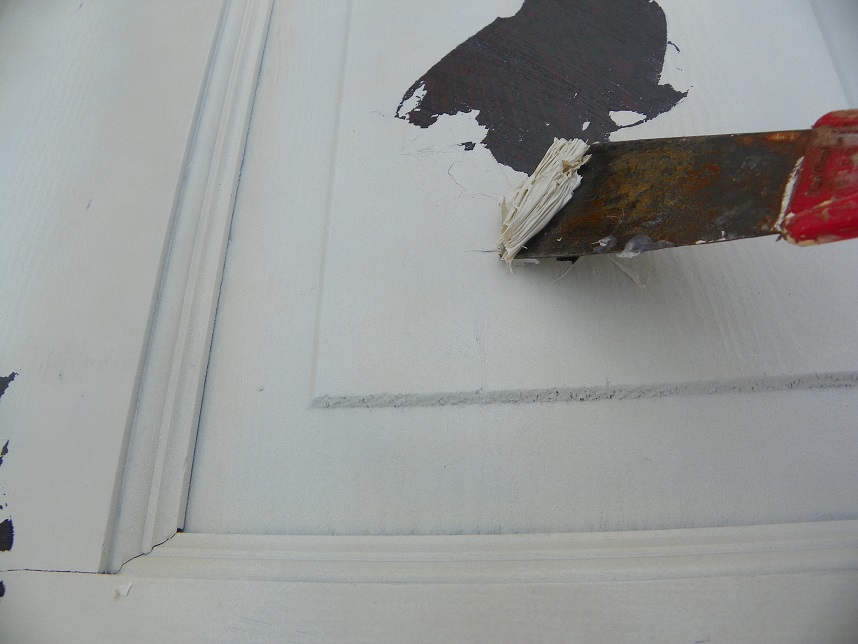
When finished scraping it should look something like this....

I wiped away the excess Vaseline and then applied some Dark stain over the entire surface.
Let sit for about 10 minutes and then wipe off excess stain...
This gives it an aging look....
I gave the entire surface a light spray of clear coat just to seal the stain,
and then I gave it 3 coats of clearcoat....
I then Started on the Base...
The entire structure on the base was made out of 2x4's

I used a Kreg Jig and 3" screws to attach the Frame together...
I L♥VE MY KREG JIG....


The shelf at the bottom ... I ripped a 2x4 in half and use them for the Brace beams
that the slats were going to sit on...
As you can see in the picture the Shelf underneath is half the width of the island
this is to allow for bar stools to be slid up under the island when not in use.

The slats are then cut out of 1x4's and are positioned slightly apart
ready to be nailed on with my handy air braid nailer...

NOTE:::
Before I nailed on the slats I painted the frame to give it a wood look appearance
and then I distressed all the edges...
I then gave all the slats a light stain and clear coat,
then I nailed them to the base....

Using my Kreg Jig I drilled some holes to the inside frame of the Base to allow me
to screw the door to it...
and WOLLA!!!! Here is the finished product.
A piece of PLEXI GLASS or TEMPERED GLASS could be used to place on top to finish it off...
THE FINAL DECISION ENDED UP BEING TEMPERED GLASS!!!!
All in all I think It turned out Quite NICE....

The Stainless steel stool in this picture was all I had at the time
but is not what is going to be used...

The Chair in the picture BELOW was found at Walmart.com and they are only
about $25 Each....

UPDATE!!!
Here is a picture of the island with The Tempered Glass on top,
and the Bar stools slid up underneath..:)

So Glad you stopped by to Visit
Please feel free to Comment
I LOVE TO HERE FROM YOU ALL....
Cheers!!!
